To set default file naming for the report:
Refer to "Creating a New Report", "Using the Report Wizard" or "Loading an Existing Report".
Micronet displays the Report Generator screen.
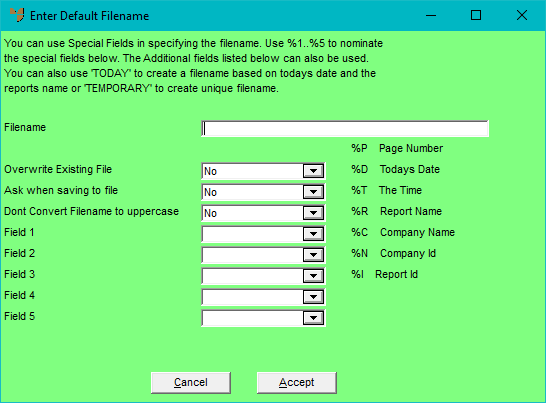
Micronet displays the Enter Default Filename screen.
|
|
Field |
Value |
|---|---|---|
|
|
Filename |
Enter the path and default filename that this report will be saved to. You enter the fields that you want included in the default filename in the order you want them displayed, e.g. %2 - %1.pdf. In this filename:
For example, if you want the filename to be (Company name) - Invoice - (Customer Name) - (Invoice Number), you would select DIH_INVNO in Field 1 and DIH_DBTNO in Field 2. You can select any of the fields in the drop down lists, as well as %D for Date, %R for Report Name, etc. If you enter ‘TODAY’ as the filename, Micronet will write the PDF with a report/filename containing today’s date. |
|
|
Use when printing |
This field is used to create a printer output file instead of sending to the printer. It should never be set to Yes. This field has been removed in Micronet 2.8. |
|
|
Overwrite Existing File |
Select Yes if you want to automatically overwrite any existing file with that filename, or No if you don't. |
|
|
Ask when saving to file |
Select whether you want users to be prompted when saving the report to a file. |
|
|
Don't Convert Filename to uppercase |
Select Yes if you don't want the filename to be converted to upper case (i.e. if the filename should be in lower case). |
|
|
Field 1 - Field 5 |
Select the actual fields that you want included in the default filename, e.g. DIH_DBTNO. You must have a corresponding entry in the Filename field, e.g. %1 for Field 1, %2 for Field 2, etc. |
Micronet redisplays the Report Generator screen.